
행복한 하루
Raspberry Pi – Linux Device Driver 만들어 보기-7 ( BMP280-Temperature, I2C ) 본문
Raspberry Pi – Linux Device Driver 만들어 보기-7 ( BMP280-Temperature, I2C )
변화의 물결 2022. 12. 14. 14:51
안녕하세요.
이번에는 I2C 통신을 이용한 리눅스 센서 드라이버를 만들어 봅니다. 그중에 BMP280 제품으로 기압과 온도를 측정하는 센서 드라이버를 만드는 내용입니다. 현재 단독으로 된 BMP280 센서 모듈을 가지고 있지 않아서 Pioneer600에 장착된 BMP280 센서로 테스트를 진행하였습니다. 개별적으로 가지고 있다면 I2C 배선만 동일하면 문제없이 테스트할 수 있습니다.
그리고 참조 유튜브에서는 컴파일하기 전에 내용이 끝나서 최종 작업과 온도 확인하는 애플리케이션을 만드는 내용을 추가했습니다.
1. BMP280 센서와 연결하기
- BMP180은 가지고 있어서 연결하는 방법만 참조하는 겸 사진을 첨부하였습니다. 만약 개별적 BMP280 센서가 있다면 동일하게 아래와 같이 연결하면 됩니다. 보통 I2C 제품 경우 4가닥으로 연결합니다.

- 이번 내용에서는 이전에 가지고 있던 Pioneer600 모듈에 장착된 BMP280이 있어 헤더 핀을 연결해서 테스트했습니다.

2. BMP280 센서 연결 확인하는 방법
- 처음에 아무 연결이 없다면 - -로 나타납니다.
pi@raspberrypi:~/DriverStudy $ sudo i2cdetect -y 1
- 모듈을 연결한 다음 77 주소가 나타났습니다. 만약 BMP280이라면 76으로 나올 수 있습니다.

- 만약 i2c가 나타나지 않는다면, 설정 파일(/boot/config.txt) i2c부분에 주석처리(#)가 되어 있을 수 있습니다. 그렇다면 해제해주고, 아무 내용도 없다면 추가하고 저장한 후 재부팅하면 됩니다. 참고로, sudo raspi-config에서 설정해주어도 됩니다.
pi@raspberrypi:~/DriverStudy $ vim /boot/config.txt
3. 드라이버 소스 확인
- 이번에는 기존에 소스를 복사하지 않고 이 글에 첨부된 파일을 다운로드해서 확인하는 것으로 하겠습니다.
- i2c 등 필요한 헤더 파일을 추가하고 장치명을 수정합니다.
#include <linux/version.h>
#include <linux/cdev.h>
#include <linux/uaccess.h>
#include <linux/slab.h>
#include <linux/i2c.h>
#include <linux/kernel.h>

#define DRIVER_NAME "bmp280"
#define DRIVER_CLASS "bmp280Class"
- i2c 장치의 정보를 구조체 포인터를 선언합니다.
static struct i2c_adapter * bmp_i2c_adapter = NULL;
static struct i2c_client * bmp280_i2c_client = NULL;
- i2c 장치 등록에 필요한 구조체 정보를 만듭니다.
/* Defines for device identification */
#define I2C_BUS_AVAILABLE         1                    /* The I2C Bus available on the raspberry */
#define SLAVE_DEVICE_NAME       "BMP280"          /* Device and Driver Name */
#define BMP280_SLAVE_ADDRESS  0x76                /* BMP280 I2C address */

static const struct i2c_device_id bmp_id[] = {
                     { SLAVE_DEVICE_NAME, 0 },
                     { }
};

static struct i2c_driver bmp_driver = {
           .driver = {
                     .name = SLAVE_DEVICE_NAME,
                     .owner = THIS_MODULE
           }
};

static struct i2c_board_info bmp_i2c_board_info = {
           I2C_BOARD_INFO(SLAVE_DEVICE_NAME, BMP280_SLAVE_ADDRESS)
};
- Datasheet 상에 있는 BMP280 메모리 맵에 맞추어 값을 읽어옵니다. 온도 데이터 3바이트(FA, FB, FC)에 걸쳐 저장되는 것을 확인할 수 있습니다. 추후 기압 데이터도 가져오는 것을 할 수 있을 것입니다.

- 데이터가 8bit(MSB) + 8bit(LSB) + 4bit(XLSB) 구성되어 있으므로 비트 연산으로 4byte(32bit) 데이터로 만들어주는 처리를 합니다.
- 온도를 계산하는 것에 정확한 이해를 하지 못했지만, DataSheet상 이렇게 온도 값을 처리하라고 샘플을 주고 있기 때문에 내용을 복사해서 사용합니다. 읽어온 온도 값에 보정값을 계산해주는 것으로 이해하고 있습니다. (어떤 내용인지 아시는 분이 계시면 댓글로 다른 분들과 지식을 나눠주셨으면 합니다. ^^)
s32 read_temperature(void) {
           int var1, var2;
           s32 raw_temp;
           s32 d1, d2, d3;

           /* Read Temperature */
           d1 = i2c_smbus_read_byte_data(bmp280_i2c_client, 0xFA);
           d2 = i2c_smbus_read_byte_data(bmp280_i2c_client, 0xFB);
           d3 = i2c_smbus_read_byte_data(bmp280_i2c_client, 0xFC);

           raw_temp = ((d1<<16) | (d2<<8) | d3) >> 4;

            /* Calculate temperature in degree */
           var1 = ((((raw_temp >> 3) - (dig_T1 << 1))) * (dig_T2)) >> 11;
           var2 = (((((raw_temp >> 4) - (dig_T1)) * ((raw_temp >> 4) - (dig_T1))) >> 12) * (dig_T3)) >> 14;

           return ((var1 + var2) *5 +128) >> 8;
}
- 애플리케이션에서 값을 읽어 갈 수 있도록 버퍼에 값을 저장해 둡니다.
static ssize_t driver_read(struct file *File, char *user_buffer, size_t count, loff_t *offs) {
...
/* Get temperature */
           temperature = read_temperature();
           snprintf(out_string, sizeof(out_string), "%d.%d\n", temperature/100, temperature%100);
...
}
- 모듈 초기화 함수에서 I2C 관련 설정을 합니다.
static int __init ModuleInit(void)
- I2C BUS 사용 여부를 확인 후 I2C 장치의 인스턴스를 생성합니다. 그리고 I2C 장치를 등록합니다.
- 참고 사이트 소스에서 i2c_new_device 인스턴스 생성 함수를 사용하면 현재 Raspberry OS 버전에서 에러가 발생합니다. 그래서 i2c_new_client_device 함수로 변경해서 컴파일해야 합니다.
           bmp_i2c_adapter = i2c_get_adapter(I2C_BUS_AVAILABLE);

           if(bmp_i2c_adapter != NULL) {
                     bmp280_i2c_client = i2c_new_client_device(bmp_i2c_adapter, &bmp_i2c_board_info);
                     if(bmp280_i2c_client != NULL) {
                                if(i2c_add_driver(&bmp_driver) != -1) {
                                           ret = 0;
                                }
                                else
                                           printk("Can't add driver...\n");
                     }
                     i2c_put_adapter(bmp_i2c_adapter);
           }
           printk("BMP280 Driver added!\n");
- 잘 등록되었는지 확인하기 위해서 Chip ID를 읽어 옵니다.
           /* Read Chip ID */
           id = i2c_smbus_read_byte_data(bmp280_i2c_client, 0xD0);
           printk("ID: 0x%x\n", id);
- 보정(Calibration) 값을 읽어옵니다.
           /* Read Calibration Values */
           dig_T1 = i2c_smbus_read_word_data(bmp280_i2c_client, 0x88);
           dig_T2 = i2c_smbus_read_word_data(bmp280_i2c_client, 0x8a);
           dig_T3 = i2c_smbus_read_word_data(bmp280_i2c_client, 0x8c);

           if(dig_T2 > 32767)
                     dig_T2 -= 65536;

           if(dig_T3 > 32767)
                     dig_T3 -= 65536;
- standby 주기 설정(0xF5)을 1000ms로 제어 모드(0xF4)는 Oversampling x16, Normal 모드로 해서 설정 값을 전달합니다.

           /* Initialice the sensor */
           i2c_smbus_write_byte_data(bmp280_i2c_client, 0xf5, 5<<5);
           i2c_smbus_write_byte_data(bmp280_i2c_client, 0xf4, ((5<<5) | (5<<2) | (3<<0)));
- 드라이버 해제시, 생성된 I2C장치를 삭제해줍니다.
           i2c_unregister_device(bmp280_i2c_client);
           i2c_del_driver(&bmp_driver);
4. 드라이버 소스 컴파일 하기
- 만약 github.com/Johannes4Linux ... bmp280.c 파일을 그대로 컴파일하면 아래와 같이 에러가 날 수 있습니다. 현재 Raspberry Pi 버전에서는 MODULE_SUPPORTED_DEVICE 지원하지 않기 때문에 주석 처리하고, i2c_new_device는 i2c_new_client_device로 바꾸면 정상적으로 컴파일이 됩니다.

- 컴파일 완료되면 bmp280_driver.ko 파일을 확인할 수 있습니다.

5. 드라이버 설치 및 확인
- 드라이버 파일을 커널에 추가한 다음 장치파일에 접근할 수 있는 권한을 줍니다. 그리고 장치 파일을 확인해보겠습니다.
pi@raspberrypi:~/DriverStudy/day7_bmp280 $ sudo insmod bmp280_driver.ko
pi@raspberrypi:~/DriverStudy/day7_bmp280 $ sudo chmod 666 /dev/bmp280
pi@raspberrypi:~/DriverStudy/day7_bmp280 $ ls -al /dev/bmp280
- 커널에 정상적으로 추가되었다면, 드라이버 소스에서 추가했던 CHIP ID를 출력 메시지를 확인해봅니다. 0x58 ID 값이 커널 메시지에 출력된 것을 확인할 수 있습니다.
pi@raspberrypi:~/DriverStudy/day7_bmp280 $ dmesg | tail -5
6. 온도를 확인하는 어플리케이션 제작
- bmp280 장치파일을 불러와서 측정한 온도 값을 버퍼에 저장한 후 최종 결과를 출력하는 프로그램으로 만듭니다.
- 소스 작성 (2초에 한번씩 읽어서 결괏값을 출력합니다.
pi@raspberrypi:~/DriverStudy/day7_bmp280 $ vim app_bmp280.c
#include <stdio.h>
#include <string.h>
#include <stdlib.h>
#include <unistd.h>
#include <fcntl.h>

int main(int argc, char * argv[]) {
  int bmp280_fd;
  int ret = -1;
  char strMsg[20];

   if ((bmp280_fd=open("/dev/bmp280",O_RDONLY)) < 0) {
    perror("bmp280 driver open fail\n");
    return -1;
  }

  while(1)
  {
    ret = read(bmp280_fd, strMsg, sizeof(strMsg));

    if( ret < 0 )
    {
      printf("bmp280 read failed\n");
      close(bmp280_fd);
      return -1;
    }
    else
    {
      printf("temperature = %s\n", strMsg);
    }
    sleep(2);
  }

  return 0;
}
- 실행파일 컴파일하기
pi@raspberrypi:~/DriverStudy/day7_bmp280 $ gcc -o app_bmp280 app_bmp280.c7. 최종 동작 확인
- 정상적으로 온도 값이 출력되는 것을 확인할 수 있습니다. 그런데 테스트 한 모듈은 Raspberry Pi CPU 바로 위에 있다 보니 실내온도보다 높게 나오는 것 같았습니다. 실제 테스트하려면 별도로 된 제품으로 테스트해보는 것이 좋을 것으로 보입니다.
pi@raspberrypi:~/DriverStudy/day7_bmp280 $ ./app_bmp280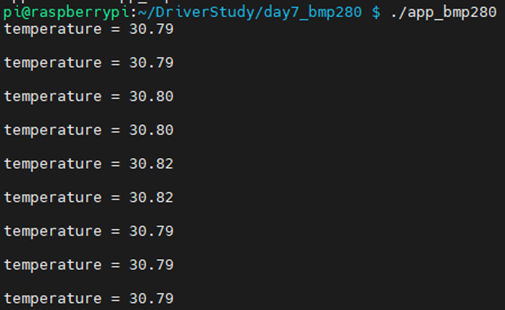
- 드라이버 사용이 끝났다면 드라이버를 제거해줍니다.
pi@raspberrypi:~/DriverStudy/day7_bmp280 $ sudo rmmod bmp280_driver
추후 BMP280 I2C 다른 소스를 참조해서 조금 더 깔끔하고 기능을 설정할 수 있는 소스로 테스트해보도록 하겠습니다.
감사합니다.
<참고 사이트>
1. Let's code a Linux Driver - 7: BMP280 Driver (I2C Temperature Sensor)
https://www.youtube.com/watch?v=j-zo1QOBUZg&list=PLCGpd0Do5-I3b5TtyqeF1UdyD4C-S-dMa&index=8
2. Linux_Driver_Tutorial/07_BMP280/bmp280.c
3. error: implicit declaration of function ‘i2c_new_device’; did you mean ‘i2c_acpi_new_device’? [-Werror=implicit-function-declaration]
4. Linux Driver Package - Release Notes MODULE_SUPPORTED_DEVICE
5. Linux I2C device driver 등록
http://egloos.zum.com/furmuwon/v/10928235


